django新建工程概述
一、安装
pip install django
二、新建工程
1.命令行新建
django-admin.py startproject HelloWorld
或者选择pycharm新建
2.Pycharm新建工程
New project -- Django --location选择站点路径 -- 点开More Settings Application name 输入APP名称 --create

命令行输入python manage.py runserver 启动django浏览器打开http://127.0.0.1:8000/出现以下界面

三、HTM文件以及静态文件的配置:
把前端给的HTML文件放到站点的根目录下的templates里面

四、写视图函数views.py
from django.shortcuts import render
# Create your views here.
defChoiceQuestion(request):
   returnrender(request,"content.html")
五、设置urls
1.在站点总urls中设置转发路由
#School_web/urls.py
from django.contrib import adminfrom django.urls import path ,include
urlpatterns = [    path('admin/', admin.site.urls),    path("answer/",include("answer.urls"),name="answer")]
2.APP的urls中设置路由
from.importviews
urlpatterns = [
    path("",views.ChoiceQuestion,name='ChoiceQuestion')]
配置好路由后在启动django
Python manage.py runserver
然后在浏览器中输入http://127.0.0.1:8000/answer/
便可看到以下界面

由于静态文件还没加载所以界面是乱的
六、静态文件的配置
在根目录下新建个static文件夹并且把所有静态文件放到里面去
#School_web/school_web/settings.py中添加

STATICFILES_DIRS = [os.path.join(BASE_DIR,"static")
 ]
在所有的HTML文件中添加
{%loadstatic%}并且所有静态文件都换成static格式
linkrel="stylesheet"href="css/bootstrap.min.css"/>
<linkrel="stylesheet"href="css/bootstrap-maizi.css"/>
换成
<linkrel="stylesheet"href="{%static'css/bootstrap.min.css'%}"/>
<linkrel="stylesheet"href="{%static'css/bootstrap-maizi.css'%}"/>
启动django
Python manage.py runserver
然后在浏览器中输入http://127.0.0.1:8000/answer/
便可看到以下界面
就表示静态页面已经设置好

建立MySQL数据库连接以及数据库模型的设置
School_web/school_web/settings.py
将
# Database# https://docs.djangoproject.com/en/3.1/ref/settings/#databases
# DATABASES = {#     'default': {#         'ENGINE': 'django.db.backends.sqlite3',#         'NAME': BASE_DIR / 'db.sqlite3',#     }# }#换成以下DATABASES = {   'default': {       'ENGINE':'django.db.backends.mysql',       'HOST':'localhost',       'USER':'root',       'PASSWORD':'root',       'PORT':'3306',       'NAME':'lhq_school_web',       'OPTIONS':{       "init_command":"SET foreign_key_checks = 0;",       }    }}
并在数据库中建立名字为lhq_school_web的数据库
配置MODELS
Answer/models.py中
fromdjango.dbimportmodels# Create your models here.
class choice(models.Model):   # id= models.AutoField(primary_key=True)    question= models.CharField(max_length=64)    option= models.CharField(max_length=64)    correct= models.CharField(max_length=64)    analysis= models.CharField(max_length=64)
数据迁移
生成迁移文件
python manage.py makemigrations
2)同步到数据库中
python manage.py migrate
可以在数据库中看到迁移过去

前端获取数据
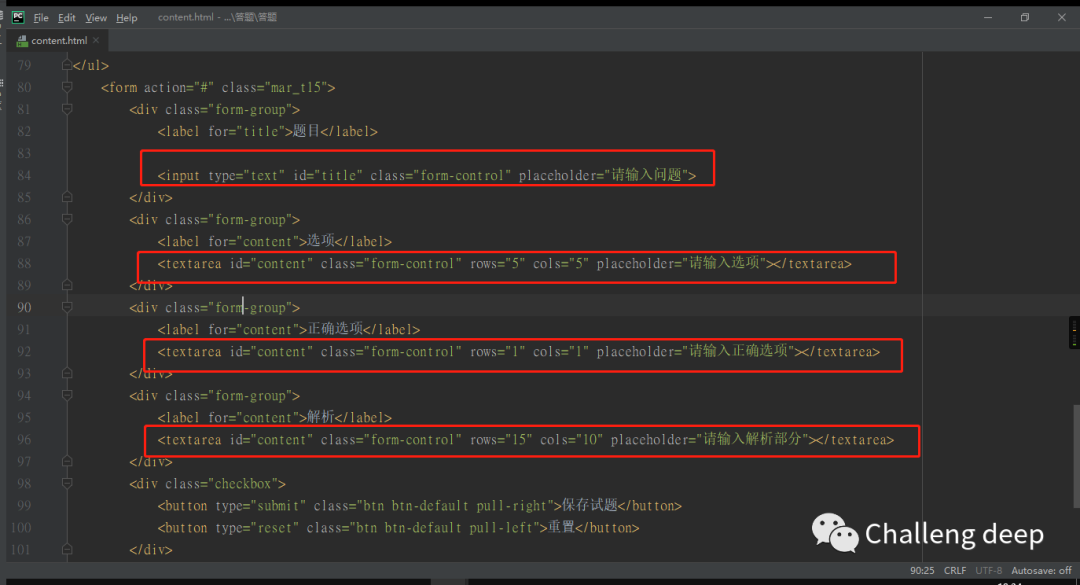
找到输入框相对应的前端代码


在
<formaction="#"class="mar_t15">
修改
<formclass="mar_t15" method="post">
 {%csrf_token%}
在所有input 里面添加属性name
例如
<inputtype="text"id="title"class="form-control"placeholder="请输入问题">
修修改
<inputtype="text"id="title"class="form-control"placeholder="请输入问题"name="question">
修改视图函数views.py
Answer/views.py修改
fromdjango.shortcutsimportrenderfromanswerimportmodels
# Create your views here.
defChoiceQuestion(request):   ifrequest.method =='POST':        question = request.POST.get('question')        option = request.POST.get('option')        correct  = request.POST.get('correct')        analysis = request.POST.get('analysis')       print(question,option,correct,analysis)        models.choice.objects.create(question=question,option=option,correct=correct,analysis=analysis)
   returnrender(request,"content.html")
启动django
Python manage.py runserver
浏览器输入http://127.0.0.1:8000/answer/
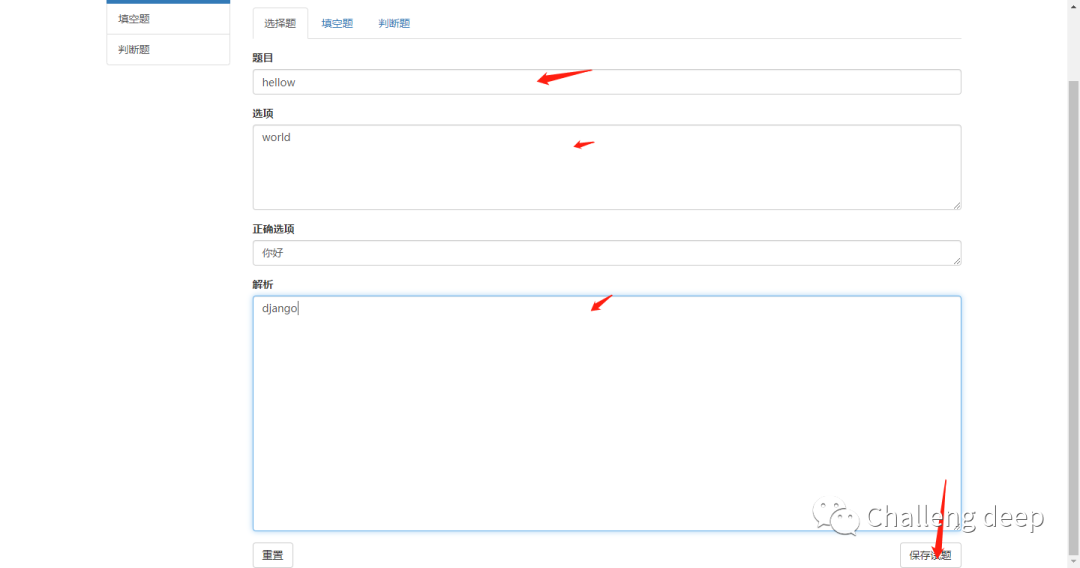
在以下界面输入框中输入数据
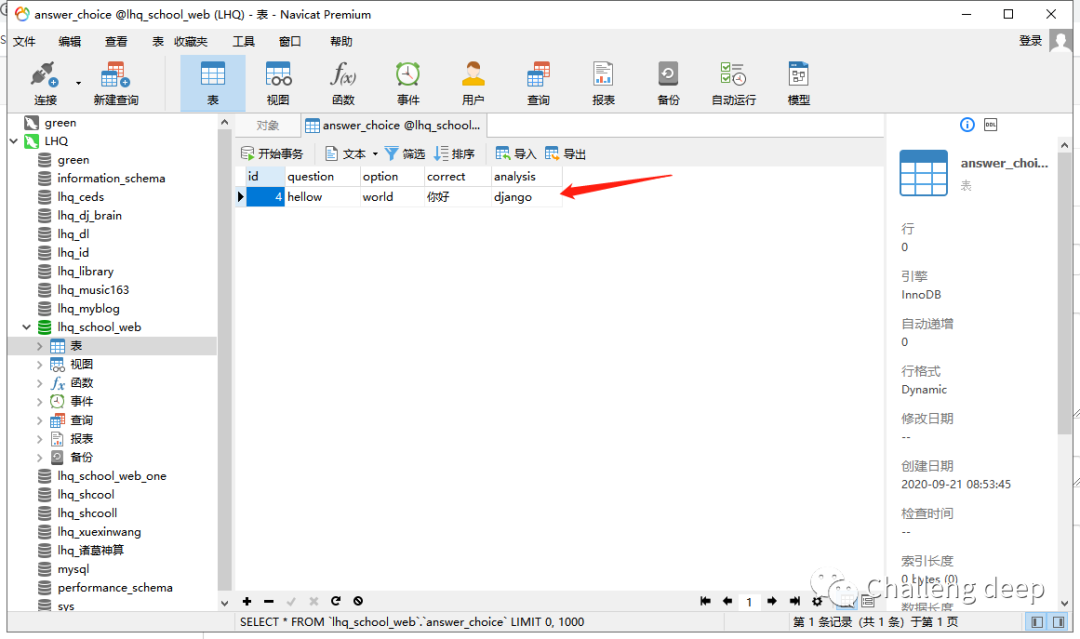
并点击提交然后到数据库中可以看到已经存入数据库


